One day, heavy history and cold views. This DMZ tour from Seoul strings together the key sights—Imjingak, tunnels, Dora Observatory, and Unification Village—with optional scenic add-ons like an Imjin River gondola or a suspension bridge at Mt. Gamak.
I love how this runs like a real operation: an air-conditioned vehicle, an English-speaking guide/driver, and admissions handled for you. I also like the option to meet a North Korean defector for a lecture, which adds a human layer to all that geography and steel.
One drawback to weigh: it’s a long, active day. There’s enough walking and steep hiking for the 3rd tunnel that people with heart disease, back issues, or respiratory problems can be unable to enter, and comfy shoes are essential.
In This Review
- Key things that make this DMZ tour work
- The DMZ day trip from Seoul: what you’re really signing up for
- Tue–Sun vs Monday: your itinerary changes in a meaningful way
- Tue–Sun: 3rd tunnel + Dora Observatory + Unification Village
- Monday: 2nd tunnel + Peace Observatory + Woljeongri train station + suspension bridge
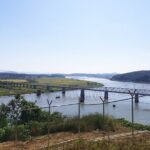
- Imjingak Park and Freedom Bridge: the emotion starts before the DMZ
- The tunnel visits: expect steep effort and strict limits
- The 3rd tunnel (Tue–Sun)
- The 2nd tunnel (Monday)
- If a tunnel is unavailable
- Dora Observatory and Unification Village: what the views can (and can’t) do
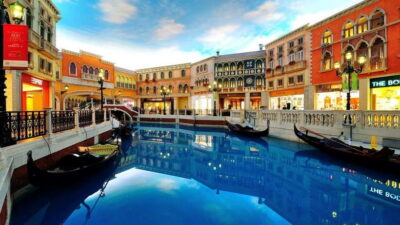
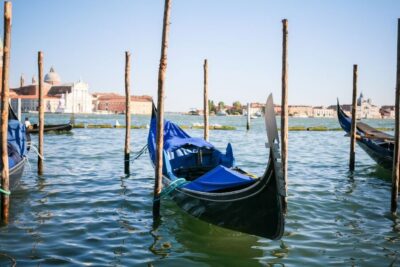
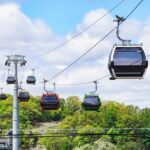
- Imjin River gondola to Gallery Greaves: the scenic alternative (optional)
- Mt. Gamak suspension bridge: a photo stop that asks for stamina (optional)
- The guide makes or breaks the day: what to expect from Patrick, Roy, and April
- Duration, timing, and why being early matters
- Price and value: is $45.86 a fair deal for this full-on day?
- Who should book, and who should skip
- Book this tour if…
- Skip or reconsider if…
- Should you book this DMZ guided tour?
- FAQ
- What does the tour include besides the DMZ sites?
- What’s the difference between the Tuesday–Sunday and Monday versions?
- Is the gondola included automatically?
- Can I meet a North Korean defector on this tour?
- Will I definitely see North Korea?
- Is lunch included?
- Is the 3rd tunnel hike difficult, and who can’t enter?
Key things that make this DMZ tour work
- Two different DMZ “routes” depending on the weekday (3rd tunnel on Tue–Sun, 2nd tunnel on Monday)
- Imjingak Park first, then the controlled entry into the DMZ via the Unification Bridge area
- Dora Observatory and Unification Village for broad views of the North-side direction
- Optional Imjin River gondola to Gallery Greaves for panoramic sightseeing
- Optional Mt. Gamak suspension bridge for photo time and steep stair-and-slope effort
- Optional North Korean defector lecture to bring personal perspective to a tense region
The DMZ day trip from Seoul: what you’re really signing up for
This is the kind of tour that feels simple on paper and intense in real life—part history class, part controlled-access sightseeing, part “your legs will file a complaint later.” The payoff is that you see multiple DMZ-related sites in one day without having to coordinate buses, tickets, and checkpoints on your own.
At the core, you’ll be transported from Seoul to the Imjingak area first, then move into DMZ-connected stops for tunnels and observation points. The route depends on the day, but the structure stays the same: start with context, visit the physical “story locations,” then finish back in Seoul after a full 7–11 hours.
The big value here is that it’s not only guided—it’s ticketed. You get admission included for the attractions on the day’s plan, plus round-trip transfers and an air-conditioned vehicle. You also get a mobile ticket, which is handy when you’re moving quickly.
Tue–Sun vs Monday: your itinerary changes in a meaningful way
This tour isn’t just a rotating schedule; your weekday changes what you see.
Tue–Sun: 3rd tunnel + Dora Observatory + Unification Village
On Tuesday through Sunday, your DMZ experience is built around the 3rd infiltration tunnel area and the view points tied to it. You’ll pass through the Unification Bridge area and visit:
- the 3rd tunnel
- Dora Observatory
- Unification Village
On these days, you can also choose scenic add-ons: an Imjin River gondola ride and/or a suspension bridge experience at Mt. Gamak.
Monday: 2nd tunnel + Peace Observatory + Woljeongri train station + suspension bridge
On Monday, the plan swaps to the 2nd tunnel side of the DMZ program. You’ll visit:
- the 2nd tunnel
- Peace Observatory
- Woljeongri train station
- and a suspension bridge (the plan names the suspension bridge as part of the Monday route)
In other words, don’t assume every day feels identical. If a specific tunnel or observatory matters to you, check the weekday carefully before you book.
Imjingak Park and Freedom Bridge: the emotion starts before the DMZ
Most people think the “real DMZ stuff” begins at the observation points. It doesn’t. Your day starts in the Imjingak area first, with a warm-up that helps you understand why all the later stops carry weight.
You’ll spend time around Imjingak Park, and depending on the day’s route you may also visit Imjingak Pyeonghwa Nuri Park for the tunnel-related entry setup. This portion is shorter than the DMZ stops, but it matters because it frames what you’re about to see: the theme of division, attempts to cross, and what people tried to do—then what got built instead.
You’ll also encounter Freedom Bridge mentioned as part of the Imjingak experience. The practical takeaway: show up ready to pay attention early. If you zone out here, the rest of the day can feel like a list of places instead of a story with momentum.
The tunnel visits: expect steep effort and strict limits
Tunnels are where this tour earns its seriousness. You’re not just looking at a memorial—you’re going to the kind of site that required physical effort and engineered secrecy.
The 3rd tunnel (Tue–Sun)
The tour notes that the 3rd tunnel requires intermediate-level hiking, and there are health limitations. If you have heart disease, back problems, or respiratory issues, you can’t enter the 3rd tunnel.
Even if you’re fit, plan for real exertion. The tour’s own guidance and the way the day is paced mean you should treat this as part of a workout day, not casual sightseeing. Bring the right clothing, and don’t plan on doing it in flip-flops.
The 2nd tunnel (Monday)
The 2nd tunnel route still includes substantial hiking and stair climbing. If your legs are fine, you’ll likely find it manageable with steady pacing. If your legs are not fine, you’ll feel it. Either way, your guide will keep the group moving so you don’t fall behind.
If a tunnel is unavailable
The tour information says the 3rd tunnel may be unavailable and the route can be changed to another destination. That’s not something you can control, so your best strategy is to book with flexibility in mind and accept that the day’s exact sites may shift for operational reasons.
Dora Observatory and Unification Village: what the views can (and can’t) do
Dora Observatory and Unification Village are the “look and understand” portion of the tour. This is where you’ll observe North Korean territory from a designated vantage point and then move into the Unification Village area as part of the same broader experience.
This section is valuable because it connects the earlier tunnel and access points to the big picture: geography. Even when it feels like a lot of rules and barriers, you’ll see why the location itself matters.
One practical note: the tour also says you may see North Korea depending on weather conditions. So don’t count on perfect visibility. If it’s clear, great. If it’s not, you’ll still get the context and structure of the visit.
Imjin River gondola to Gallery Greaves: the scenic alternative (optional)
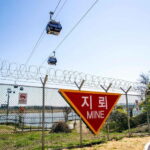
If you choose the gondola option, you’ll get a scenic ride to Gallery Greaves with panoramic views. This can be a relief valve in the middle of a day that otherwise includes hiking, stairs, and long walking loops.
The gondola is also a smart option for people who want strong sightseeing value while reducing some land-based effort. It’s still part of the same DMZ day, but it gives you a different kind of “viewing” time.
If you’re a photographer, the gondola approach is useful because it tends to offer broad angles without requiring as much steep movement in the moment.
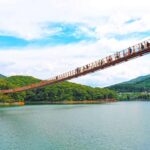
Mt. Gamak suspension bridge: a photo stop that asks for stamina (optional)
If you choose the suspension bridge option, you’ll head to Mt. Gamaksan Suspension Bridge area on the Tue–Sun schedule. This is a classic “climb first, reward later” segment.
You should expect a hike up and down with stairs and slopes. Reviews tied to this tour repeatedly mention that the bridge segment includes a workout feel, and it’s not for people who want a flat, easy walk.
Still, for the right group, it’s a great swap: you get open-air views and a strong photo moment, and you break up the tunnel/observatory rhythm with something visually dramatic.
The guide makes or breaks the day: what to expect from Patrick, Roy, and April
This tour lives on guidance. The schedule is busy, and the DMZ environment is not the place to “figure it out as you go.” The guide role here is practical and emotional: explaining what you’re seeing, setting expectations, and keeping everyone moving.
Across guide names you may encounter—Patrick, Roy, and April—the themes are consistent:
- Clear organization and keeping the group on track
- Context-setting before key locations so you’re not lost
- Energy that keeps the day from turning into pure fatigue
One consideration: some people note the pace can feel tight in certain areas, with very limited time to take photos. That doesn’t mean the tour is poorly planned—it means you should go in knowing your guide may prioritize getting you to the next site on time.
If you’re sensitive to strict pacing, keep that in mind and plan to focus on what your eyes catch during the allotted time, not on lingering.
Duration, timing, and why being early matters
This is a 7–11 hour day. The listing notes that the itinerary excludes travel time between destinations, which is a polite way of saying: the driving and transfer time adds up too.
Expect:
- A first stop around Imjingak after meeting in Seoul
- Multiple DMZ-side stops with walking and stairs
- A ride back to Seoul at the end
Also, the tour notes drop-off locations can shift based on traffic. So if you’re planning dinner reservations or a late-night flight, keep a buffer.
Wear shoes for walking. Not just “comfortable.” Shoes that handle uneven ground and stair climbs without turning your feet into protest signs.
Price and value: is $45.86 a fair deal for this full-on day?
At $45.86 per person, this tour is priced like a budget-friendly full-day option. The value question isn’t the sticker—it’s what’s included.
What you’re getting:
- Air-conditioned vehicle
- English-speaking guide/driver
- Admissions to the attractions on the plan
- Round-trip transfers
- Gondola and/or suspension bridge access if you choose those options
- Optional North Korean defector lecture
What you’re not getting:
- Meals and beverages
- Lunch isn’t a long, flexible break
- The day is active, so you should treat it like an outing where you’ll spend energy and then need to refuel after
If you compare the included admissions and transportation convenience, this can be good value—especially because DMZ logistics are not easy to DIY. If you want zero walking, it’s not that kind of tour. But if you want one guided day that hits multiple headline sites, the price can make sense.
Who should book, and who should skip
Book this tour if…
- You want a structured DMZ overview from Seoul in one day
- You care about tunnels and observation points, not just photos from the bus window
- You like guided context before you stand in high-emotion places
- You want the option of gondola views or the Mt. Gamak suspension bridge photo stop
- You’re interested in the optional North Korean defector lecture for a personal perspective
Skip or reconsider if…
- You have health limits that affect the 3rd tunnel (heart disease, back issues, respiratory problems)
- You’re looking for a low-effort day
- You struggle with stair-heavy movement and steep inclines
This tour is best for people who can handle a workout-style sightseeing day while staying attentive and following guidance.
Should you book this DMZ guided tour?
If you want an organized, guided DMZ day that covers the major sights—Imjingak, tunnels, Dora Observatory, Unification Village—and you’re okay with a long day and real walking, I think this is a strong booking.
Your decision should come down to two things: your stamina and your interest in the add-ons. If a gondola or suspension bridge matters to your trip, pick the option that fits your energy level. If your health situation makes the 3rd tunnel a no-go, plan for the Monday route instead, since the tour clearly distinguishes what happens by weekday.
FAQ
What does the tour include besides the DMZ sites?
It includes round-trip transfers from your Seoul meeting point, an air-conditioned vehicle, an English-speaking tour guide/driver, and admission to the attractions on the route. Depending on what you select, it can also include the gondola and/or the suspension bridge ticket.
What’s the difference between the Tuesday–Sunday and Monday versions?
Tue–Sun focuses on the 3rd infiltration tunnel, Dora Observatory, and Unification Village, with optional gondola and suspension bridge experiences. Monday swaps to the 2nd tunnel route, plus Peace Observatory and Woljeongri train station, along with a suspension bridge.
Is the gondola included automatically?
No. The gondola is optional. You can select it when booking. The suspension bridge is also optional, and you can choose one or both options depending on availability.
Can I meet a North Korean defector on this tour?
There is an optional meeting with a North Korean defector for a lecture as part of the tour.
Will I definitely see North Korea?
Not always. The tour notes that seeing North Korea depends on weather conditions on your tour date.
Is lunch included?
No. Meals and beverages are not included.
Is the 3rd tunnel hike difficult, and who can’t enter?
The 3rd tunnel requires intermediate-level hiking. The tour states that people with heart disease, back problems, or respiratory problems cannot enter the 3rd tunnel.